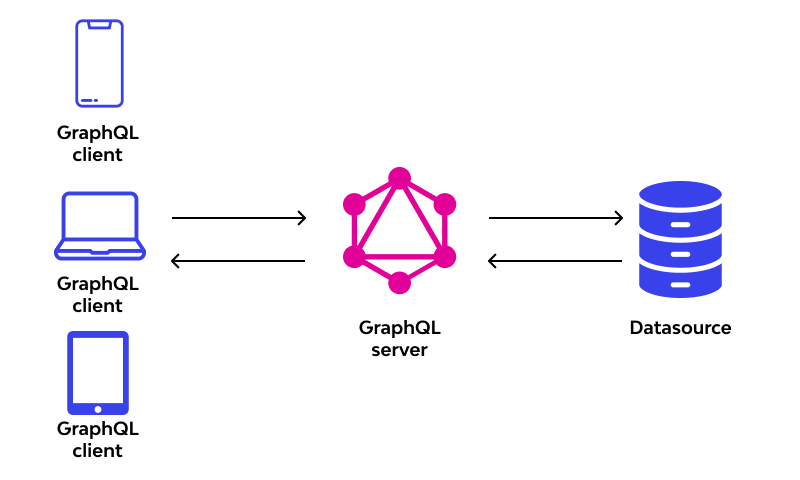
GraphQL has revolutionized the way we design and interact with APIs by offering a flexible, efficient, and powerful alternative to REST. If you’re new to GraphQL and want to get started, this guide will walk you through building a simple GraphQL API from scratch. By the end, you’ll have a working API that you can extend and customize for your own projects.
What You’ll Need
Before we begin, make sure you have the following installed:
- Node.js: GraphQL servers are often built using Node.js. Download and install it from nodejs.org.
- npm: npm (Node Package Manager) comes bundled with Node.js and will be used to install dependencies.
- A Code Editor: Use any code editor you’re comfortable with, such as Visual Studio Code, Sublime Text, or Atom.
Step 1: Set Up Your Project
- Create a new directory for your project and navigate into it:bashCopymkdir graphql-api cd graphql-api
- Initialize a new Node.js project:bashCopynpm init -y
- Install the necessary dependencies:bashCopynpm install apollo-server graphql
- Apollo Server: A popular library for building GraphQL servers.
- GraphQL: The core library for implementing GraphQL in JavaScript.
Step 2: Define Your GraphQL Schema
The schema is the foundation of your GraphQL API. It defines the types of data available and the operations (queries and mutations) that can be performed.
Create a new file called schema.js and add the following code:
javascript
Copy
const { gql } = require('apollo-server');

// Define the schema using the GraphQL schema language
const typeDefs = gql`
  type User {
    id: ID!
    name: String!
    email: String!
  }

  type Query {
    users: [User]
    user(id: ID!): User
  }

  type Mutation {
    addUser(name: String!, email: String!): User
  }
`;

module.exports = typeDefs;
In this schema:
- We define a
Usertype withid,name, andemailfields. - We define two queries:
users: Returns a list of all users.user: Returns a single user by ID.
- We define a mutation:
addUser: Adds a new user and returns the created user.
Step 3: Implement Resolvers
Resolvers are functions that handle the logic for fetching and manipulating data. They correspond to the queries and mutations defined in your schema.
Create a new file called resolvers.js and add the following code:
javascript
Copy
// In-memory data store
let users = [
  { id: '1', name: 'John Doe', email: 'john@example.com' },
  { id: '2', name: 'Jane Smith', email: 'jane@example.com' },
];

// Define resolvers
const resolvers = {
  Query: {
    users: () => users,
    user: (parent, args) => users.find(user => user.id === args.id),
  },
  Mutation: {
    addUser: (parent, args) => {
      const newUser = { id: String(users.length + 1), name: args.name, email: args.email };
      users.push(newUser);
      return newUser;
    },
  },
};

module.exports = resolvers;
In this example:
- We use an in-memory array (
users) to store data. - The
usersresolver returns the entire list of users. - The
userresolver finds and returns a user by ID. - The
addUserresolver creates a new user and adds it to the array.
Step 4: Set Up the Apollo Server
Now that we have our schema and resolvers, let’s set up the Apollo Server to serve our GraphQL API.
Create a new file called server.js and add the following code:
javascript
Copy
const { ApolloServer } = require('apollo-server');
const typeDefs = require('./schema');
const resolvers = require('./resolvers');

// Create the Apollo Server
const server = new ApolloServer({ typeDefs, resolvers });

// Start the server
server.listen().then(({ url }) => {
  console.log(`🚀 Server ready at ${url}`);
});
This code:
- Imports the schema and resolvers.
- Creates an instance of
ApolloServerwith the schema and resolvers. - Starts the server and logs the URL where it’s running.
Step 5: Run Your GraphQL API
- Start the server by running:bashCopynode server.js
- Open your browser and navigate to
http://localhost:4000. You’ll see the Apollo Studio interface, where you can interact with your GraphQL API.
Step 6: Test Your API
Let’s test our API by running some queries and mutations.
Query: Fetch All Users
graphql
Copy
query {
  users {
    id
    name
    email
  }
}
Response:
json
Copy
{
  "data": {
    "users": [
      {
        "id": "1",
        "name": "John Doe",
        "email": "john@example.com"
      },
      {
        "id": "2",
        "name": "Jane Smith",
        "email": "jane@example.com"
      }
    ]
  }
}
Query: Fetch a Single User by ID
graphql
Copy
query {
  user(id: "1") {
    id
    name
    email
  }
}
Response:
json
Copy
{
  "data": {
    "user": {
      "id": "1",
      "name": "John Doe",
      "email": "john@example.com"
    }
  }
}
Mutation: Add a New User
graphql
Copy
mutation {
  addUser(name: "Alice Johnson", email: "alice@example.com") {
    id
    name
    email
  }
}
Response:
json
Copy
{
  "data": {
    "addUser": {
      "id": "3",
      "name": "Alice Johnson",
      "email": "alice@example.com"
    }
  }
}
Step 7: Extend Your API
Now that you have a basic GraphQL API up and running, you can extend it by:
- Adding more types (e.g.,
Post,Comment). - Implementing more complex queries and mutations.
- Connecting to a database (e.g., MongoDB, PostgreSQL) instead of using in-memory data.
- Adding authentication and authorization.
Conclusion
Congratulations! You’ve just built a simple GraphQL API using Apollo Server. This is just the beginning—GraphQL offers endless possibilities for building flexible, efficient, and scalable APIs. As you continue your journey, explore advanced features like subscriptions, middleware, and integrations with databases and third-party services.

